

7 Tips for Choosing Dairy Milking Equipment
Choosing dairy milking equipment is not simply a matter of buying the newest machine. It is a daily decision about cow comfort, milk quality, labor, maintenance, and long-term farm performance. The right system should match herd size, barn layout, milking frequency, available staff, and future expansion plans. A small family dairy may need a dependable parlour with easy-clean components. A larger operation might benefit from automation, real-time monitoring, and faster cow flow.
Dr. Jeffrey Bewley, a respected dairy systems specialist, has said, “Data is only as good as the decisions you make with it.” That principle applies when comparing dairy milking equipment. Ask what the equipment measures, how clearly it reports problems, and whether your team can act on the information. A dashboard looks impressive. It does not replace trained observation. Watch cows entering the parlour. Listen for unusual vacuum sounds. Check teat condition after milking. Small details reveal large problems.
This guide explores seven practical tips for selecting equipment with greater confidence. It considers milking speed, vacuum stability, cleaning performance, operator safety, spare parts, service support, and total ownership cost. Price still matters. It should not lead every decision. A cheaper system may create higher labor demands or costly downtime. Even experienced farmers can overlook installation quality or future repair access. That is worth admitting. Equipment choices are rarely perfect. The best decision comes from careful measurements, honest farm assessments, supplier demonstrations, and advice from qualified dairy professionals. Your cows will show whether the choice works.
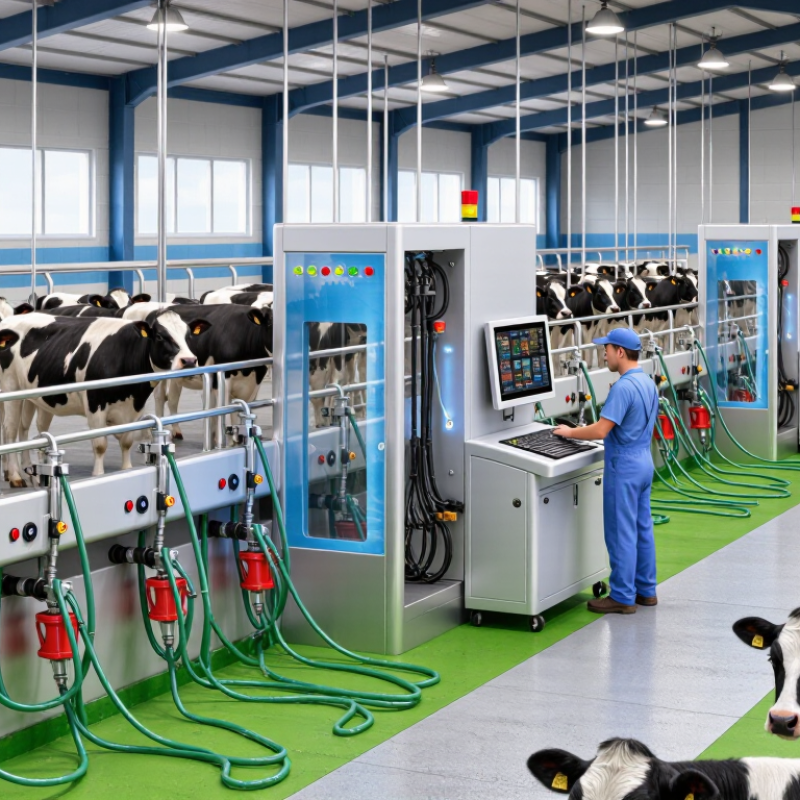
Table of Contents
[Hide]
Define Your Dairy Farm’s Milking Needs and Herd Size
7 Tips for Choosing Dairy Milking Equipment
Define Your Dairy Farm’s Milking Needs and Herd Size
Choosing dairy milking equipment starts with the herd, not the catalog. Record cow numbers, milking frequency, expected peak yield, and available labor. A 60-cow herd milked twice daily needs a different rhythm from 180 cows milked three times. Count stalls, too. Daily throughput depends on cow movement, attachment time, washing, and staff changes. These details expose bottlenecks that a sales brochure may not show.
Measure the busiest milking period, not the weekly average. Note how many cows one operator can prepare, attach, monitor, and release without rushing. Equipment should match that pace while protecting teat preparation and post-milking hygiene. Ask whether the vacuum system, pulsation, milk lines, and cooling capacity can handle peak flow. Poor sizing creates unstable milking and unnecessary idle time. Leave room for training. Even a technically sound setup can fail when controls feel confusing or cleaning steps are skipped.
Plan for the next five years, but challenge your assumptions. Will the herd grow, or will labor become the real limit? Check water pressure, electrical supply, drainage, service access, and backup procedures before choosing equipment. Talk with a dairy veterinarian, milking technician, and operators who use comparable systems. Ask for measured performance data, maintenance records, and cleaning results. I have seen farms overbuy capacity and underbudget maintenance. That mistake is expensive. Simple records from your current routine can reveal the more honest equipment requirement.
7 Tips for Choosing Dairy Milking Equipment - Define Your Dairy Farm’s Milking Needs and Herd Size
| No. | Planning Dimension | Typical Farm Condition | Suitable Equipment Direction | Useful Planning Data | Key Selection Check |
|---|---|---|---|---|---|
| 1 | Define Herd Size | 20–50 lactating cows | Pipeline milking system, portable milking unit, or a small 2-stall milking area | Usually 1–2 milking clusters; approximately 20–35 L of milk per cow per day may be used for initial capacity planning | Allow room for herd growth and ensure the vacuum pump can operate all intended clusters simultaneously |
| 2 | Match the System to Herd Scale | 50–150 lactating cows | Swing-over or parallel parlour, commonly configured with 2 × 4 to 2 × 6 stalls | Approximately 8–12 milking positions; practical throughput often depends on cow flow, preparation, and operator routine | Compare total milking time, labour availability, entry and exit speed, and cleaning time |
| 3 | Plan for Larger Herds | 150–400 lactating cows | Parallel or herringbone parlour, often with 2 × 8 to 2 × 16 stalls | Approximately 16–32 milking positions; multiple operators may be required during peak milking periods | Evaluate automatic cluster removal, cow identification, milk metering, and traffic-flow design |
| 4 | Consider High-Throughput Options | More than 400 lactating cows or farms requiring short milking shifts | Large parallel parlour or rotary system with capacity matched to the herd and labour plan | A rotary system may provide continuous cow movement; actual throughput varies with platform size, loading rate, and milking routine | Calculate cows per hour, daily operating hours, maintenance access, and backup procedures |
| 5 | Size the Milk Cooling System | Any herd size, especially farms with infrequent milk collection | Bulk milk tank or cooling system sized for production, collection interval, and expansion | Planning volume = number of lactating cows × expected daily milk yield; include reserve capacity for herd growth and peak production | The system should cool milk rapidly to approximately 4°C or below, subject to applicable regulations and collection requirements |
| 6 | Match Milking Frequency and Routine | Two or three milkings per day, depending on production goals and labour availability | Choose equipment that supports consistent attachment, gentle milking, automatic take-off, and efficient cleaning | Most conventional dairy systems operate on a regular schedule with approximately 8–12 hours between milkings | Check whether the equipment can maintain stable vacuum, correct pulsation, and consistent teat preparation |
| 7 | Allow for Expansion, Hygiene, and Service | Farms expecting herd growth, higher yields, or additional automation | Modular equipment with accessible components, automated cleaning options, and upgrade-ready controls | Plan for approximately 10–20% future capacity where practical; verify water, electricity, drainage, and ventilation requirements | Prioritise cleanability, spare-parts availability, preventive maintenance, operator safety, and compliance with local regulations |
Note: Capacity ranges are general planning guidelines. Final equipment sizing should be confirmed using the farm’s actual herd size, milk yield, milking frequency, labour plan, building layout, utility capacity, and local dairy regulations.
Related Posts
-

Top 10 Milking Parlour Equipment Suppliers Worldwide?
-
Top Dairy Barn Equipment for 2026 What to Consider?
-
Exploring China Top Milking Equipment for Modern Dairy Farming?
-
Top Cow Milking Equipment to Buy in 2026?
-
Why Choose the Right Milking Parlour Equipment?
-
Top 10 Types of Milking Parlour Equipment for Dairy Farms